Asphalt Shingle Roof Installation Guide
Do you need roof repair of your asphalt shingles roof or are you looking to have asphalt shingles roofing installed? Turn to the experts at Marva Roofing. We’re proud to serve the RGV including McAllen, Mission, Brownsville and more. Our asphalt shingles roofing installation services offer a number of benefits to beautify and protect your home including low maintenance, excellent durability, superb energy efficiency and fire resistance. Asphalt shingles roofing in Texas is also easy to repair and shingles are readily available. With proper installation, asphalt shingle roofing can last 20-30 years.
Trust the professionals at Marva Roofing to handle your asphalt shingles roofing installation with care and professionalism. Whether it’s a fix for a leaky roof, a new construction, residential roofing or commercial, you can count on our superior service and dedication to get the job done right.

Step-by-Step Guide on How to Install
Asphalt Shingles
Step 1
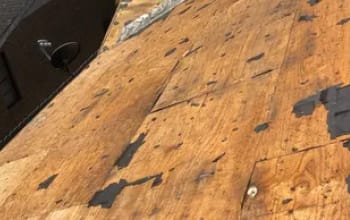
Tear Off Shingles/Inspect Decking
Shingles tear-off constitutes a crucial procedure during the installation of shingles roofing. This process gives your shingles installer the opportunity to thoroughly examine your decking and address any essential repairs. While manufacturers technically permit a single overlay, it is not recommended. The primary drawbacks associated with shingles overlay include increased roof load and the potential for imperfect alignment of new shingles. That’s why it’s so important that any contractor you choose to install your shingles roofing has a thorough understanding of the proper techniques involved in asphalt shingles installation.
Step 2
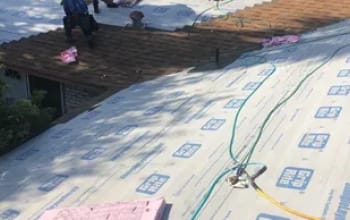
Install Synthetic Underlayment/Ice Water Shield
Using Synthetic Underlayment during the installation of your asphalt shingles, ensures the inclusion of ice/water shield application in valleys. During the process, you should absolutely install a sturdy metal pre-flashing, measuring a minimum width of 20 inches and having a gauge of 30, prior to the ice/water shield placement to prevent tearing. In instances where an initial metal pre-flashing was previously installed by the roofing company during the construction phase and remains undamaged, you can still use it in your current project without having to replace it. Otherwise, your roofing company will expertly overlay the ice/water shield atop the existing valley metal pre-flashing to ensure optimal performance and protection.
Step 3
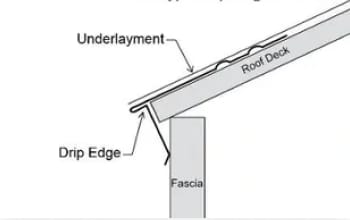
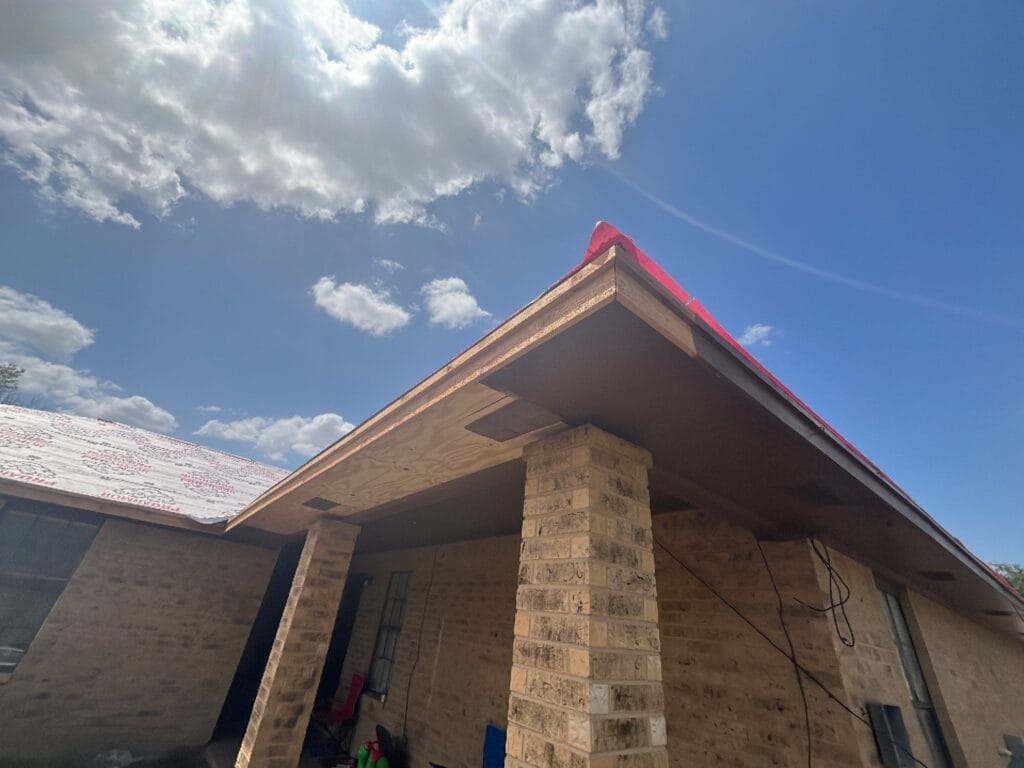
Install Drip Edge/Flashings
Incorporate the installation of a Metal Drip Edge as a vital and indispensable component within your Shingles Roofing System. However, equal attention should be given to the profile and dimensions of the Drip Edge being utilized. The most favorable choice is the “D” style Drip Edge, as its specific design allows for a shingle overhang of at least 1 inch beyond the fascia. This matters because it serves to safeguard your fascia wood trim from premature deterioration. Additionally, it is imperative to address other critical flashings, including kickouts and wall flashings. Prior to commencing the project, it is advised to confer with your roofing professional to ensure that any damaged flashings are replaced and that all necessary flashings are appropriately included if not already present.
Step 4
Install Starter Shingle
The inclusion of Starter Shingle is an essential aspect within a comprehensive Asphalt Shingles Roofing System. All reputable Shingles Manufacturers mandate the installation of a dedicated row of starter shingles over the drip edge. This crucial step ensures that the initial row of shingles adheres securely, forming a reliable seal that effectively safeguards against potential leaks caused by wind-driven rain. Moreover, the incorporation of starter shingles significantly enhances the overall resistance of asphalt shingles to uplift wind pressures, thereby fortifying the integrity and longevity of the roofing system.
Step 5
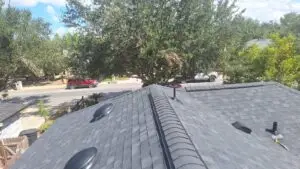
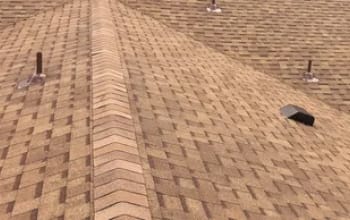
Install Shingles
All Manufactures will provide an approved install shingles method. This may include:
1. Type of Nails
2. Number of Nails
3. Nails placement
4. Shingles Spacing
5. Shingle Reveal
6. Field, Valley and Rake Detail
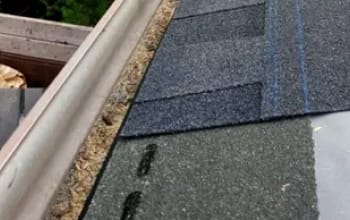
Step 6
Install Ridge/Hip Cap
The incorporation of Ridge/Hip Cap stands as a pivotal element in the finalization of an asphalt shingles roof installation. It is noteworthy that a significant portion of shingle repairs on existing roofs often focus on this particular area. Such issues commonly arise from inadequate nail placement per ridge cap shingle or the utilization of cut 3-Tab shingles as a substitute for the dedicated product designed for ridge/hip cap application. To ensure optimal outcomes, it is advisable to consult with your asphalt shingles installer regarding the specific type of ridge/hip cap shingle they employ. Their expertise in selecting and utilizing the appropriate materials will contribute to the long-term durability and performance of your roofing system.
Additional Asphalt Shingles
Roof Components
Attic Ventilation
It is crucial to prioritize a thorough inspection of your attic ventilation system by your Shingles Roofing Installer. This ensures the presence of appropriate vents on your roof that cater to your specific roofing requirements. Attic vents come in various shapes and sizes, making it essential to consult with your Asphalt Shingles Installer to ensure the selection and installation of the correct type. The installation of suitable vents serves a dual purpose: maintaining a cool attic environment, which contributes to optimized AC power consumption, and protecting your decking or shingles from potential damage. By giving due importance to proper attic ventilation, you can enhance the energy efficiency and overall longevity of your roofing system.
Plumbing Vents
Plumbing vents hold a significant role in complying with building codes and act as an essential component for ventilating your plumbing system. Their primary purpose is to facilitate the release of odors and gases, ensuring they do not accumulate in the attic or living spaces. Proper flashing of the plumbing vents is crucial to maintain their integrity and prevent potential leaks. This meticulous approach to the flashing process safeguards against water infiltration and preserves the overall functionality of the plumbing ventilation system. By following these recommended practices, you can ensure a fully operational and code-compliant plumbing system that promotes a safe and odor-free environment within your living space.
Skylights
There are a wide range of additional roof components that can be incorporated, such as skylights (available in various styles and sizes) and Solar Panels. It is vital to consult with your Asphalt Shingles Installer to ensure the proper utilization of suitable flashings or sealants, effectively preventing any potential leaks. This meticulous attention to detail in the selection and application of flashings and sealants guarantees optimal protection against water infiltration and upholds the overall integrity of the roof system.
Many homeowners wait too long to address roofing issues. Learn more about when to replace your roof in McAllen to avoid costly damage.
Facia Asphalt Shingles Installation Repairs
Fascia Repairs
(Carpentry)
Fascia Repairs
When it comes to replacing asphalt shingles, it’s essential to follow a key guideline: thoroughly inspect and replace any damaged fascia boards ASAP. Putting off their replacement until after the drip edge installation can make things more complicated and may even lead to higher costs. We understand that finding a contractor willing to tackle this task later on can be challenging due to the intricacies involved and slim profit margins. That’s why you can trust the experienced team at Marva Roofing to get the job done right. Contact us today for a free estimate and let our experts take care of your roofing needs.
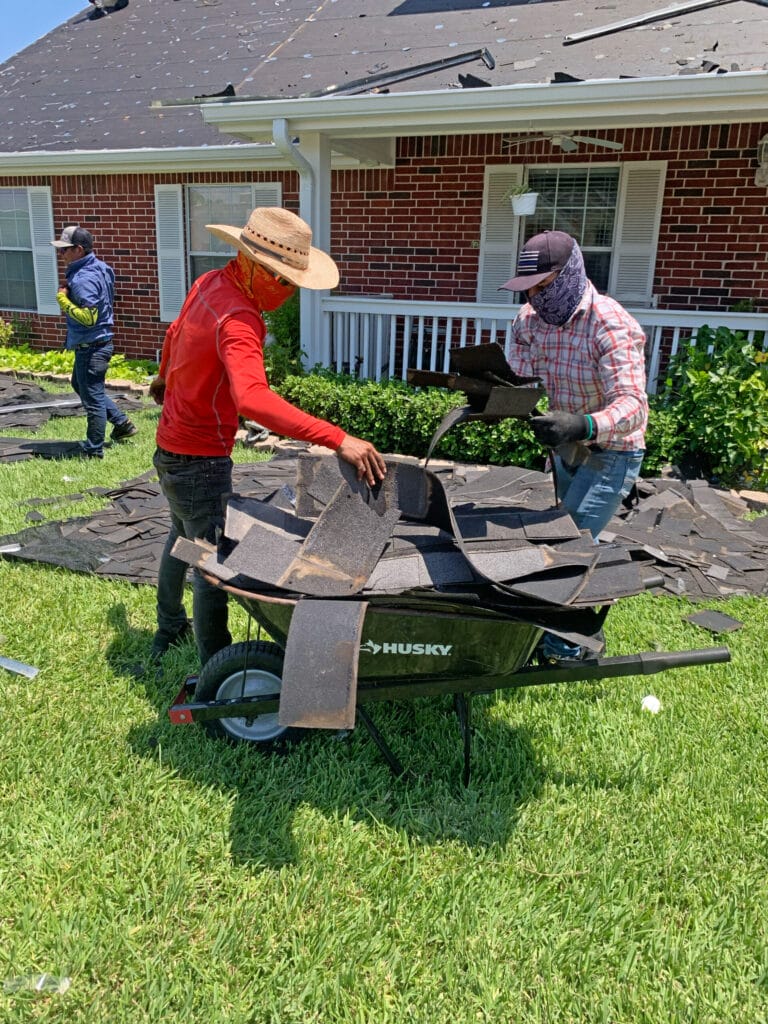
Clean-Up
Last but not least, Clean up
Lastly, let’s not forget about the clean-up process, which is just as important as knowing how to install shingles. Make sure to check with your Asphalt Shingles Installer to confirm that clean-up and dump fees are included in the total cost of replacing your Asphalt Shingles. It’s also a good idea to ensure they have a dumpster on-site before they start, so there’s minimal debris left on the ground. This way, you can enjoy a tidy work area and have peace of mind knowing that your Asphalt Shingles Installer takes care of the clean-up process, making the whole experience hassle-free.
Before starting the tear-off process, it is crucial to communicate with your roofing team about specific areas that require extra attention and protection. This includes flower beds, the AC unit, plants, garden decorations, or any valuable items that may be at risk from flying debris. It is advisable to request the use of tarps or nets to catch debris before it reaches the ground, if feasible. By proactively addressing these concerns and taking preventive measures, you can ensure the safety and preservation of your valued possessions throughout the tear-off process.
Be aware of concealed areas behind plants, the AC unit, or any other spots where debris may potentially be overlooked. Request that the installers utilize magnets during the clean-up process to ensure thorough collection of any nails that may have inadvertently landed on the ground. By paying attention to these hidden spaces and using magnets to pick up any stray pieces, you can enhance the overall cleanliness and safety of the work area, leaving no trace of debris or potential hazards behind.
Facia Asphalt Shingles
Installation Repairs

Warranty
Final Invoice and Warranties
Additional Information
Once your roofing project is complete, there are a few important things to take care of. First off, make sure you pay the final amount for the job. Then, don’t forget to ask for a copy of the invoice showing that everything’s been paid. It’s also a good idea to request the registration for the material warranty to protect your investment. And don’t forget to get a copy of the labor warranty too for some extra peace of mind. If you’re interested, you can even ask for some photos of the entire roof installation process. This might come in handy if you need to show them to your insurance agent. By getting these things sorted out, you’ll have all the documentation you need and be confident about your roofing project.